Always a little under TomTom's shadow, Route 66 has been the 'other' satellite navigation system for Symbian OS for quite some time. For Series 60 smartphones it was notable in running on almost any hardware, from a lowly Nokia 3650 or Sendo X upwards. A UIQ version has been slow to arrive, not least because of the problems of squeezing the map data onto the 128MB maximum capacity of a standard Memory Stick Duo for use in the Sony Ericsson P800 and P900. In the end, Route 66 settled for just compatibility with the P910i and Motorola A1000, using a 256MB memory card, in similar manner to TomTom. I reviewed Route 66 for UIQ here, giving it 74%, but here's a proper walkthrough of the software in action.
In addition to the steps shown, you'll find it very useful to add particular locations as favourites. This is absolutely crucial to efficient use of any PDA-based satellite navigation system. Quite apart from regularly used addresses (which will also be in 'History'), there are countless places you'll visit which have no obvious (or remembered) address: zoos, parks, suppliers, historic buildings, specialist shops are just a few locations that are best 'discovered' and then added to your 'Favourites' database so that you can get back there again at a later date. Don't rely on the built-in POI (Points Of Interest) databases as these are very sparsely populated.
If you own a Series 60 smartphone, note that most of the steps here are very similar to those in this UIQ edition.
First steps with Route 66 Mobile Britain for UIQ
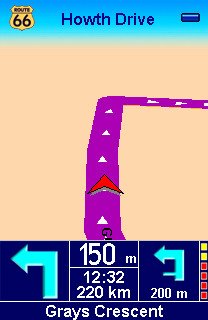
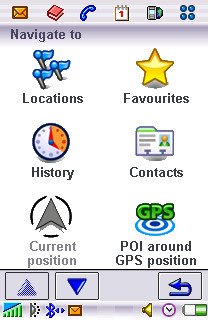
First of all, don't be alarmed by your first view of Route 66. With no route planned and (assuming you're stationary) without a moving signal, it has no route info to show and no way of knowing what detail level to present. Thus you get a mainly blank screen! Tap the screen to bring up the main menu. Of the three screens of menu options, you'll be using 'Navigate to' 95% of the time. Tap on it to bring up the main navigation menu. 'Locations' is covered in a moment, but make sure make good use of 'Favourites', 'History' and 'Contacts'; each will save you a lot of time once you've used Route 66 for a while.

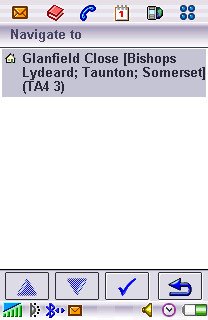
Tap on 'Locations'. The critical thing about Route 66 is that it really, really likes postcodes (including the spaces). A road and town or village will often fail with 'No matches' (because the road is sometimes listed under the nearest major post town), so start by entering a bit of the road name and the first part of the postcode. You can use Jot with the stylus, by the way, you don't have to use the rather horrible letter grid. For example, 'Glanf TA4' will easily match 'Glanfield Close, Bishop's Lydeard, Taunton TA4 3BH'. This is pretty powerful, and it helps enormously to know the postcode of where you're trying to get to.

Tapping on the tick icon will start your navigation, with turn instructions for the next and 'one after that' junctions. The detail level is varied automatically, as appropriate for your speed. Make sure your main P910i 'Multimedia volume' is set to maximum and that you've turned up the Route 66 volume (using the Jog Dial).
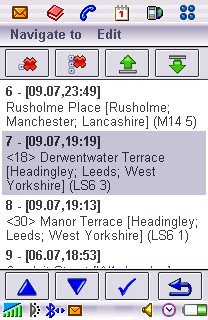
Route 66's 'History' feature is terrific, you'll never have to enter the same destination twice. Once you've planned a route, it'll be here in the 'Navigate to' 'History' list. Just select the one you want and tap the tick icon to go there again. Use the top icons to delete items you know you're not going to need again.