Come on, admit it. As will I. 99% of all your photos taken on your Nokia smartphone have been taken with the camera set fully on 'Automatic', i.e. with nothing special set up at all. This isn't necessarily a bad thing and, indeed, it's a tribute to the auto-exposure and auto-focussing software inside each focussing S60 phone that most photos come out pretty darned well.
But, this begs the question: what use are all the fancy modes and options if they're not needed most of the time? In this feature, I'm going to look at each one and run a few experiments to both a) explain (theoretically) why an option is there and b) whether you'll ever need it!
Scene modes
- Automatic - the default that we all use most of the time
- User defined - as it sounds, once you've pored over this feature and worked out that you do actually need some particular settings turned on, you can change this scene mode to use it and get all these settings applied, in the right combination, all at once. The only trouble is that unless you're in the habit of taking the same scene under the same lighting conditions, this feature won't actually help much - see below...
- Close-up - when you focus normally, the focussing software 'hunts' through a focal range from about 10cm to infinity, looking for the best contrast. Close-up mode is for when you know you want to shoot right at the edge of this range. I use it a lot when photographing phones(!), but you may find it useful for nature close-ups. Focussing here hunts from about 6 or 7cm up to 2 metres. So quite a big overlap between this and 'Automatic' then and you may only need 'Close-up' in extreme circumstances
- Portrait - nothing to do with aspect ratio, the theory here is that photos are taken with wider aperture and shorter shutter time, giving narrower 'depth of field'. The net effect is supposed to be that your subject will be crisp but everything around will be slightly out of focus, helping the subject to 'leap out'. In my tests though, the effect was marginal at best. A mode to ignore.
- Landscape - again nothing to do with aspect ratio, the theory is that in this mode the focussing software is bypassed and focus is set on infinity. This is all very well, but in my test photos it seems that the software's efforts to 'enhance the sharpness of distant objects' is more about applying an artificial level of digital sharpening/edge enhancement, with consistently ugly results, as shown below. Definitely avoid this scene mode.
- Sports - the theory here is that by using an average focal length (e.g. your child, 10 metres away, doing something active) and, again, bypassing the focussing software, you can not only rattle the shot off faster, but a shorter shutter time. The system works well, effectively reducing your nice 5mp focussing camera to a 5mp fixed-focus, instant-shooter. But when your kid is hurtling towards you, baton in hand at school sports day, you haven't got the time or opportunity to focus properly, so this is just what's needed.
- Night - here the flash is disabled, often because you want a naturally lit effect, and the shutter time is lengthened to be as long as is needed to gather enough light for a photo. In very dim conditions, the shutter speed might be as slow as half a second, so keep that phone rock steady, ideally bracing against something solid and make sure your subjects aren't moving.
- Night portrait - the same effect as with 'Portrait', in theory, but optimised to work with LED flash. A niche mode that's not worth worrying about, I suspect.
SUMMARY: Sports is the only scene mode you'll have to worry about in real life. And even then only when kids or animals are involved or when attending a motor sports event...
Colour tone
- Normal
- Sepia - the cliched 'antique photo' look. Avoid!
- Black and white - occasionally useful, but it's far more flexible to shoot in colour and dither to monochrome in desktop editing software later for those wanting extremely arty effects
- Vivid - you'd think that this would be useful for enhancing colours, but in my tests I couldn't tell the difference between this and 'Normal'
- Negative
SUMMARY: You can safely ignore 'Colour tone' settings. If you want a special effect, you can always do this later on, on a desktop etc.
White Balance
- Automatic
- Sunny - It's quite evident that the 'Automatic' white balancing setting is geared for bright-but-overcast conditions, meaning that photos taken in direct sunshine can look good but somewhat washed out - somehow the colours aren't quite as satisfying as you hoped they would be. As you can see below, manually setting White Balance to 'Sunny' can sometimes make a big difference - all of a sudden, colours are vivid and rich. You should note, though, that this was the most dramatic of my test photos - my other four involved three where there wasn't much difference and one where 'Sunny' actually spoiled the colours completely. You should also note that the actual settings used to make up 'Automatic' and 'Sunny' do vary from device to device and from firmware to firmware(!)
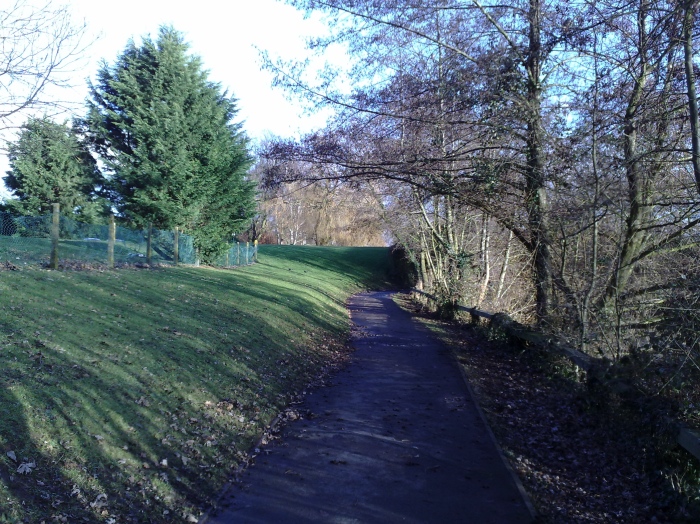
Initial shot, weak winter sun, on 'Automatic'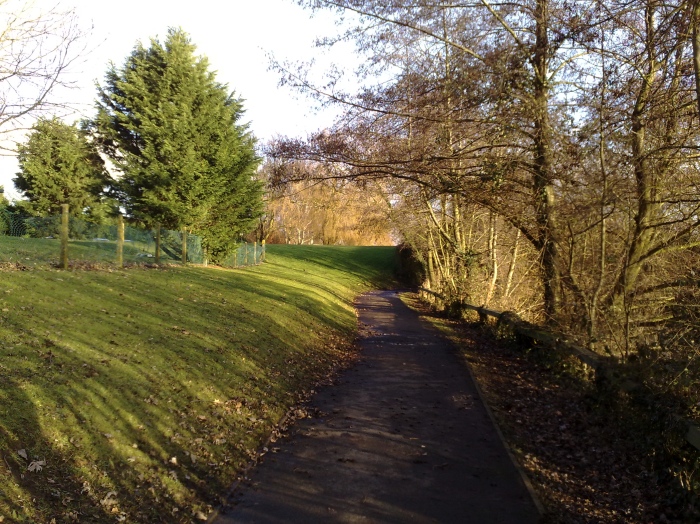
The identical scene, but with 'White balance' set to 'Sunny'. A very pleasing difference!
Here's another data point, looking at detailed crops of the same sunlit scene, side by side. Notice that there's a very slight improvement in colour saturation in the right hand 'Sunny' shot. But you have to admit that the difference is marginal....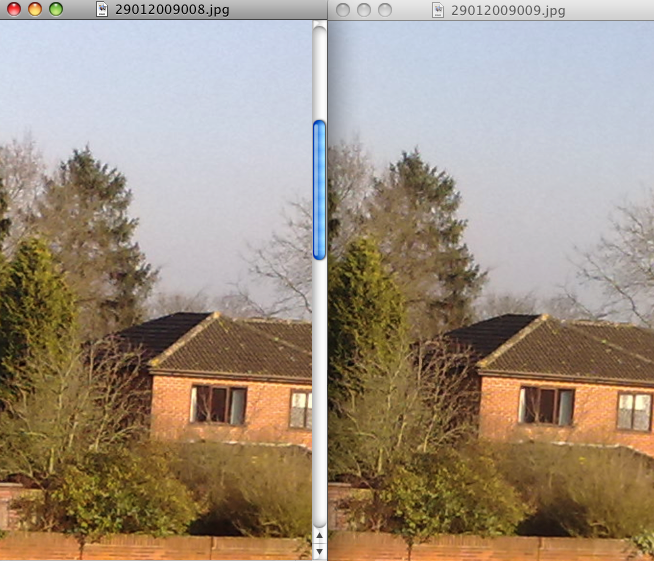
- Cloudy - given what I'd already stated about the default White Balance, I wasn't expecting 'Cloudy' to make any real difference. In fact, I'd say that use of this setting worked about as well as 'Sunny' in terms of its success rate. Again, the test shot below was the one with the most dramatic difference, three other test shots showed no significant difference.
The original shot, on 'Automatic'. Not bad considering the weak winter lighting, actually.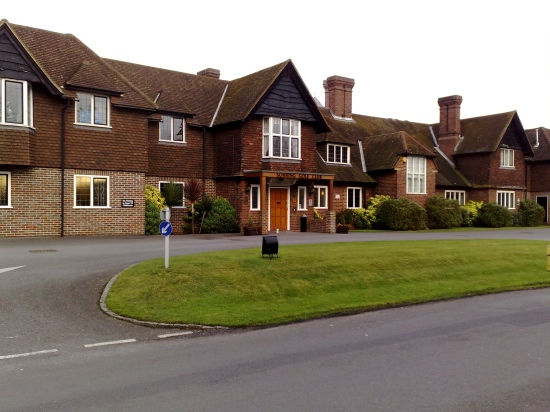
And the identical scene, taken on 'Cloudy'. Significant extra colour, though purists would probably argue that the grass is now 'too green'. Pah - what do the purists know...
- Incandescent - a preset for a fast-becoming-bygone age. The theory is that photos taken under old fashioned 'incandescent' light bulbs will look artificially warm and yellow, but the effect is somewhat marginal and becoming less and less relevant now that the world is rapidly switching over to 'energy saving' bulbs, whose light characteristics seem more akin to the next option...
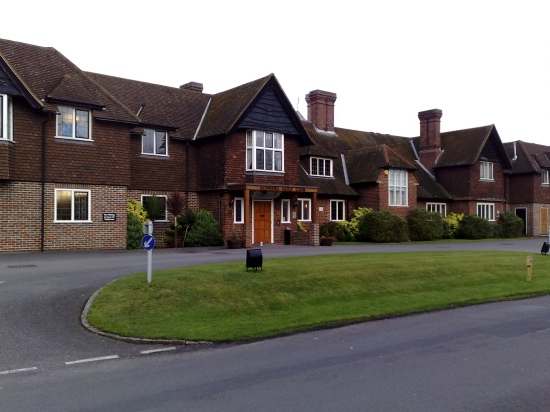
- Fluorescent - more and more prevalent these days indoors, but also a lot less of a problem, since fluorescent lights have a more accurate white balance than incandescents. Here's an example of a well-lit and colourful fluorescent scene - as you can see, using this White Balance setting has no discernible effect. Another setting to ignore.
testpics (supermarket)
SUMMARY: These White Balance settings have the most practical impact on Nokia Camera photos - potentially. The situation's not that clear cut though...
Exposure, Sharpness, Contrast, Light Sensitivity
There's a reason these settings are buried at the bottom of the Nokia Camera app toolbar - you can fiddle with all of these and they'll make a significant difference. BUT you have to really know what you're doing. ex-SLR buffs will think nothing of "cranking up the exposure, increasing the ISO light sensitivity" and so on, but to be honest, if you're going into that sort of detail you shouldn't really be shooting photos with a 'phone' (however good) in the first place.
Conclusion
My advice to you, when trying to take decent ad-hoc photos with your Nokia N82, N95, N85 or similar is to forget about almost all the options here. If speed is of the essence (e.g. trying to capture a moment) then just leave everything on 'Automatic' - the phone camera will do a decent job and you can always tweak brightness, contrast and saturation (e.g.) later in an image editor on the PC. The 'Sports' scene mode might be the only thing worth setting, meaning that you get a pre-focus and can snap at an exact moment in time (i.e. your subject is moving).
If you've got a few seconds to stop and think about what you're shooting, ignore everything else apart from the two 'White balance' settings, 'Sunny' and 'Cloudy'. If you're after capturing vivid colours then these settings can sometimes make a difference, as shown above. But don't worry if you forget, the effect is usually marginal and, again, colours can be 'brought out' later on in an image editor if needed (see the PS. below).
Note: The photo tests here were taken on the slightly older Nokia N82 and N95 8GB - I don't believe the camera algorithms are mature enough yet in the N96 (for example) to be representative of how the software is supposed to work.
Steve Litchfield, All About Symbian, 1 Feb 2009
The PS: Fakery
Just a quick example of this fakery and to reassure you that you shouldn't worry too much about getting the colours perfect in the original captured photo, here's a shot, taken on the N82 with everything on 'Automatic', of a subject in a Bluebell wood in early summer. I say 'summer', but this was 2008 in the UK and we didn't really have one. It was damp and overcast and very cold. But I took the shot anyway:
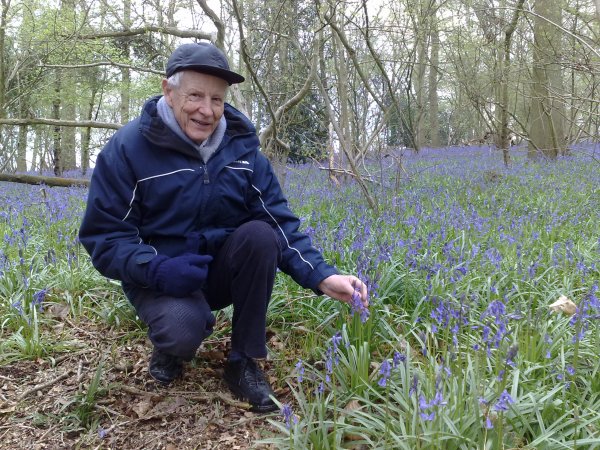
Back on my PC in Paintshop Pro, 30 seconds worth of tweaks to the colour balance produced this, looking almost like the sun was shining and certainly a more pleasing representation of how the Bluebell wood should have looked:

Complete fakery, of course, but if the result was a photo that the subject really enjoyed receiving a print of, then what's the harm?
8-)