In part 1, we used an example that was so dark that it wasn't really representative of a scene you'd try to snap in real life. What about scenes that have more light in them, at a gig, or indoors in the gloom - is there still an argument for fiddling with ISO?
ISO adjustment under controlled conditions
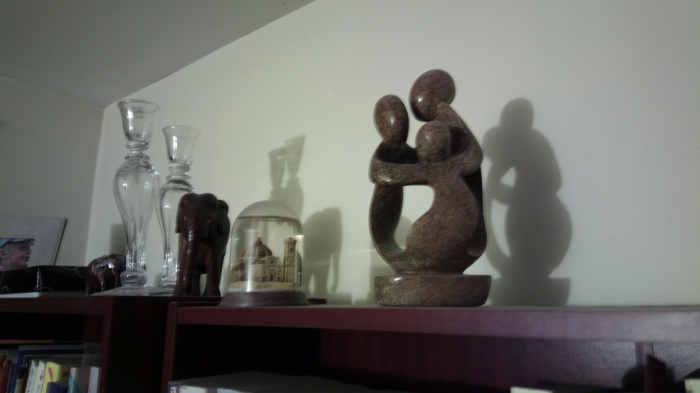
One problem with ad-hoc event snaps is that everything's changing all the time, it's impossible to replicate the combination of subject and light from one shot to another. In an effort to demonstrate ISO adjustment even more clearly, I isolated a statue in our living room as a good subject, illuminated only by a 60W bulb about ten feet away and with a nice shadow behind. Leaving aside flash issues (i.e. Xenon or LED), I turned this off completely, so as not to confuse the situation, i.e. I wanted to capture ambient light only.
Here's the statue scene at ISO 100:
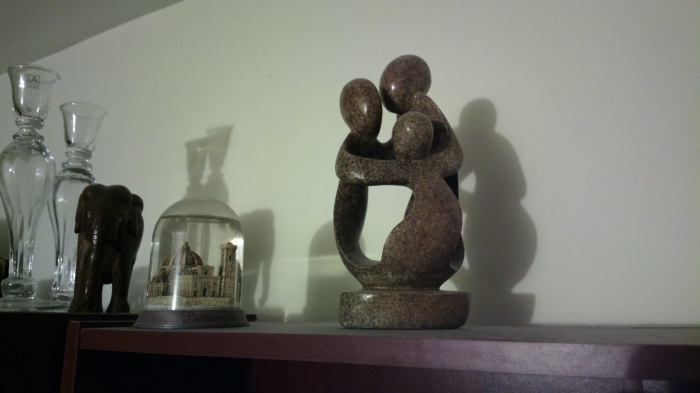
Then again at ISO 400:
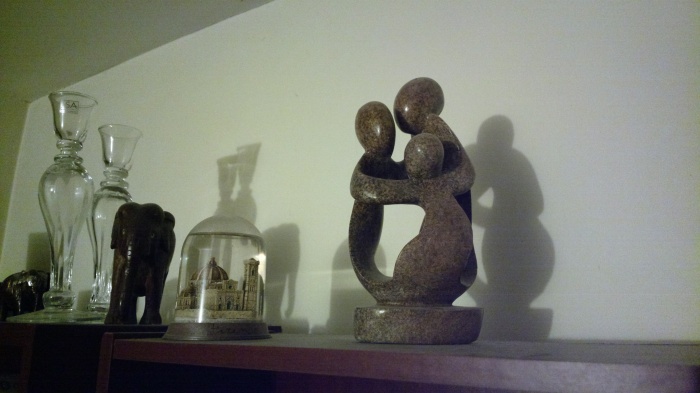
Then again at ISO 800:
To the naked eye there's not much difference, other than the first having a little camera motion blur due to the longer exposure time used. In a low light situation like this where you don't want to use flash (for whatever reason) and you don't have a tripod to hand, it's perfectly practical to consider increasing the ISO number in order to gather the scene more quickly and reduce the effects of handheld camera shake.
So that we can see the differences more easily, let's crop in on the central detail for all three images, ISO 100 at the top, then ISO 400 then ISO 800:

Yes, snapping a statue at half a metre without flash in a poorly lit living room is itself a bit artificial, but the controlled conditions give a beautifully clear illustration of the tradeoffs between ISO speed and noise.
The top crop shows obvious camera shake/blur (exposure time was 1/2s), even though I was trying to keep the phone steady, while ISO 400 is sharper (exposure time was 1/8s) and ISO 1600 sharpest of all (exposure time was 1/30s).
Why not, then, keep ISO that high all the time? Because you also get lots of noise - look at the shadow of the statue on the wall - the noise (artefacts/speckles) gets much worse as we move from ISO 100 (almost no noise) to ISO 1600 (everything in the image has a mottled pattern of randomness superimposed).
Now - is there an optimum ISO setting, for which you get the best chance at a crisp shot and yet minimise the amount of noise incurred? Yes, absolutely, see my conclusion at the bottom.
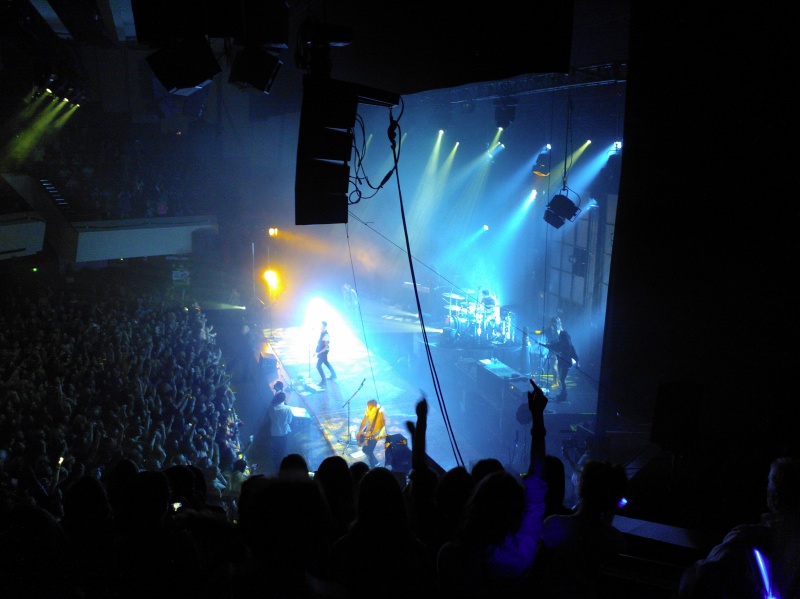
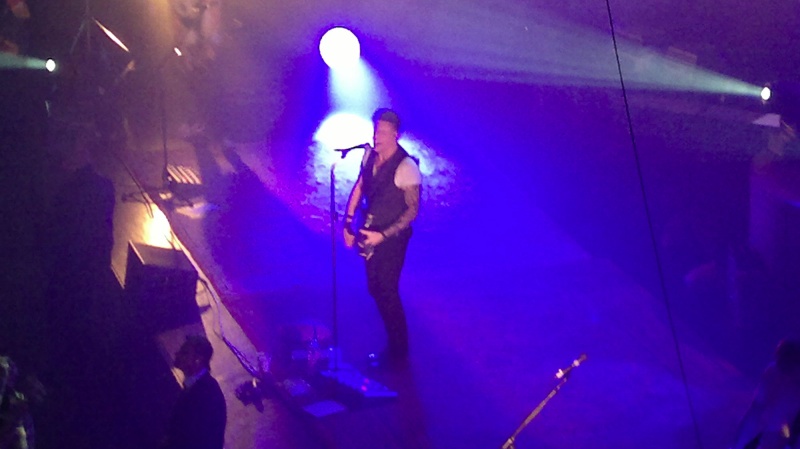
An extreme example from a rock gig
Using high ISO numbers at gigs isn't a new concept - I was using ISO 400 35mm film back in the 1980s to snap my favourite musicians (while trying to avoid the bouncers - you were usually not allowed to take photos - how times have changed!) and the technique works just as well these days. Here's an extreme example from April (i.e. pre-Nokia 808, this was actually taken on the N8), we were at a gig and in a very non-optimum position, high up on the side of the balcony, here's the overall scene, which shows how far away we were from the centre of the stage action:
Now, I wasn't after anything special, but it would have been nice to get a snap that was a bit closer. With my Nokia N8 on ISO 100 and then cropping in, I ended up with something like this - the archetypal mobile phone camera blurry snap:
So all very murky in terms of detail then, with elements of motion blur from the subject (shutter time was 1/10s or so) and probably from my handheld use too. So I tried setting the ISO to 800, here's one of the shots, cropped in again slightly:
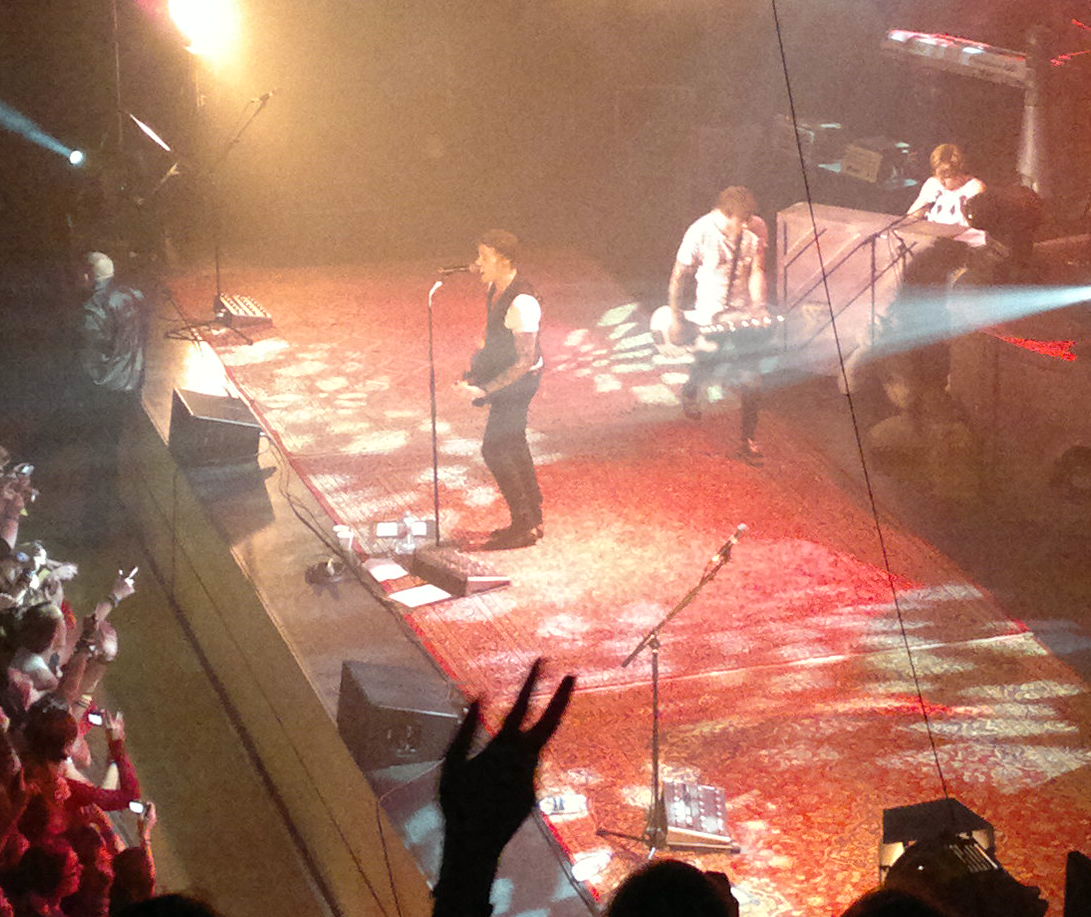
A dramatically different feel to the photo - note how the shot is crisper (shutter time was 1/30s), yet with the downside that I talked about above, i.e. far more digital noise ('speckles') and a somewhat artificial look to proceedings.
Although I didn't save the image at the time, I seem to remember that the N8 on 'automatic' wanted to use ISO 300 - probably a good compromise?
I'd welcome more examples from others if you've been taking high ISO shots and comparisons at live events (I don't get out as much as I used to!) - leave them in the comments or email me.
In summary
I mentioned above that for most situations there's probably an optimum combination of ISO, exposure time and so on, that will give you decent results without too much blur or noise. There is, and the thing to realise is that Nokia got there before you. Take a photo on your N8 or 808 in lowish light (without flash) in full 'automatic' mode and look at the ISO figure used (in the EXIF data) - you'll usually see something like 200, 300 or 500. In other words, the algorithms in the camera software are spotting the same ambient parameters you are and are coming to similar conclusions.
If you're simply after the best, optimised photo with least chance of camera shake and the least noise, then leave everything on 'automatic'.
Which is reassuring, i.e. that you don't have to jump through mental hoops everytime you want to snap something - just trust the N8 or 808 software. And it reaffirms the name of the detailed settings panel on the Nokia 808 - 'Creative'. It's explicitly for when you want something different, some special effect, something..... creative. The rest of the time, you can relax and let the Camera app take the strain (though see also my piece on 'Scene modes', which offer a great compromise between 'Auto' and 'Creative').
PS. And I can't help but repeat my maxim from part 1, whatever mode you're in, whatever light conditions, do everything you can (stop breathing, rest the phone on a ledge or tripod) to keep the camera phone stock still - it makes all the difference!
PPS. If you're really into low light, flashless photos then of course the Windows Phone-powered Nokia Lumia 920 will be of interest - keep up with our continuing review coverage over at All About Windows Phone.