One of the great features on the Nokia N95 that marks it out as “more than a phone” is the ability to edit your media on the device to create a pretty good video presentation – while it might not be up to the standards of the BBC, it is more than good enough for the vast majority of users to put together short clips, montages, and ‘video diaries’ without having to resort to (potentially) expensive and complicated PC or Mac based solutions.
So, before we go any further, here’s a video put together on the N95 that I made for the recent Yahoo! Hackday in North London. The event asked the invite crowd to hack together a project and present it on stage at the end of the day. As everyone had 90 seconds, I decided to document the process and put it all together on a smartphone.
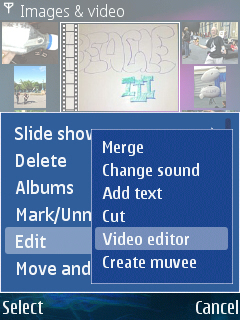
To kick off the video editor (as opposed to the Muvee editor, which is something different entirely) you’ll need to go to Gallery and select Video Editor from the Edit menu. This will take you into the main editing window.
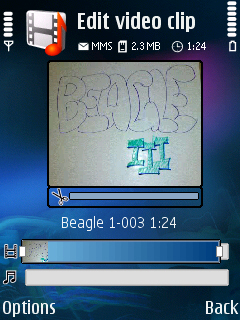
Along the top of the screen you’ll see details on file size and length of the video, then a smaller display of the video picture. The filename of the section you’re editing is under there. Then you have the timeline, represented by two bars. The top is for visuals, the bottom is for sound.
As with any project, a touch of planning is always recommended, so this tutorial is going to look at doing an opening text screen, a few still images to set the scene, a portion of video, and then finish with some credits. Over that I’ll place some music while the images are displayed, and then do a voice-over for the video. This will cover the main functions of the Video Editor.
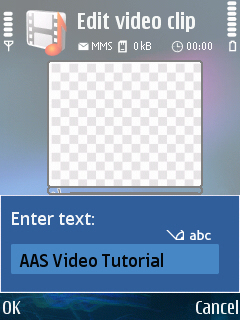
Text screens
You have three styles of text to choose from, the Title Text (a central block of text), Sub Title (aligned bottom left) and Credits. The first two also have the option to be faded out for a more gentle look. The credits do a traditional scroll up the screen. Once you’ve entered text and chosen the style, you can easily alter them, try other effects, change the text and background colours, and generally fiddle around.
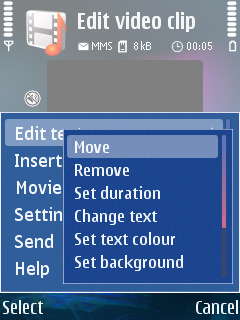
One of the key options (and you’ll see this in all the edit boxes of each element) is ‘Set duration’. This defaults to 5 seconds, and unless you’re going for a rapid cut MTV style music video, this is a good, gentle default to work with.
Transitions and Images
Let's add in our second visual section; a number of camera images taken on a day out to create a slideshow. So use left and right on the cursor pad to move the cursor on the visual timeline to the next empty ‘slot.’ But before you get there, you’ll find something called ‘transition.’ This is exactly as it says, with up and down selecting either no transition, fade to black or fade to white. How you set this up is an artistic choice, but generally put a fade between each block of scenes, otherwise leave them as no transition.
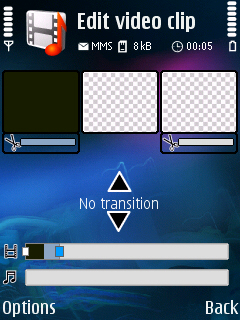
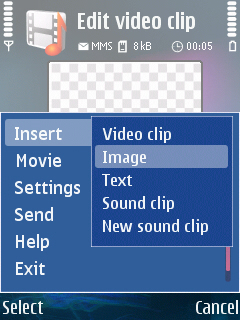
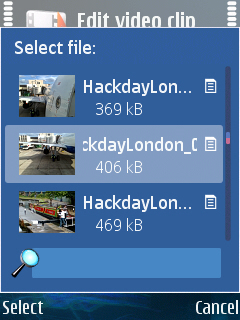
Adding images into your video is a simple matter of 'Insert | Image' and selecting the image from the file browser. It will then appear in the timeline, and you can scroll left and right to add another image, tweak the transitions, and add a colour tint effect.
Video
Of course, the power of a video editing application is in editing video itself. As with images, selecting a video recorded on the N95 is a matter of inserting it from the menu. You can now set three things – where the clip starts, where the clip ends and the sound level.
The ‘Cut’ option brings up a video player screen. Start playing the clip and you can mark the ‘start’ and ‘end’ points of the clip that will be shown in your final video. A good rule of thumb on where to edit your clips is to start the clip as close to the story/action as possible, and leave as quickly as you can.
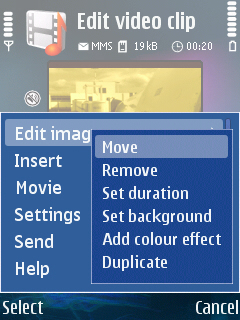
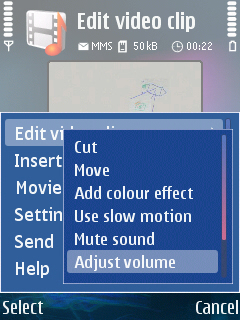

You can also mute all the sound from the video, or alter the volume – which is useful if you plan to add a musical track, or a voiceover, and also if you’re stringing together a number of video clips to keep everything consistent.
Audio Options
Right, onto the bottom line of the timeline. This is the audio, and you have two options here. The first is to add in a music track that is already on your phone. In exactly the same way as adding an image or a video clip, you select 'Insert Sound Clip' (just make sure that you press the down cursor to highlight the bottom time line) and you’ll get the by now familiar file browser. You’ve also got a search box to help you find a clip, if you have a lot of music.
The second option is to record a voiceover with the built in microphone or hands free kit. While the timeline does fill up as you record (so you can sync to the individual elements), you’ll need to remember each one as it doesn’t play the movie alongside.
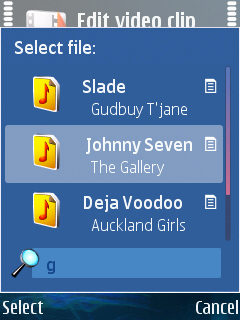
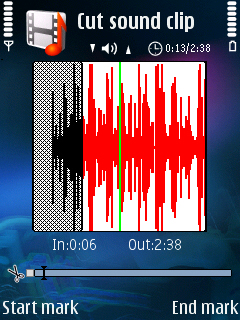
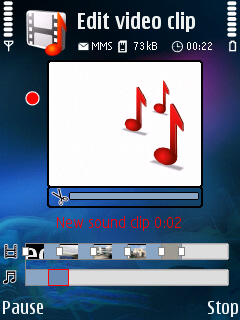
As with the video clip, you can edit the start and end points of your audio, and set the volume of that section in a basic editor.
Previewing and Exporting Your Video
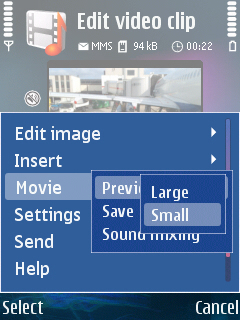
At any point in the editing process, you can preview your video either as a ‘small’ or ‘large’ video. Unless you need pixel perfection, a small preview will be enough to check everything is okay (and save some of the precious RAM on the N95) while you continue to add content to your video.
When the time comes to export the final video, both Steve's and my recommendation is to export at the 'medium' size (in Settings). The RAM on the N95 makes exporting at the 'high' setting (resolution 640x480) just out of reach. In any case the popular video storage sites (such as YouTube) and the almost de facto resolution for video podcasts all run at 320x240 pixels, which just happens to be that of the 'medium' setting.
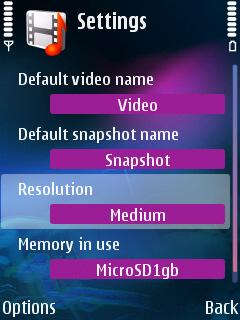
The outputted MP4 will sit in your Videos folder, and can be copied over the PC Suite or USB connection (if saved on the MicroSD card) to any PC, where the use of a standard format means that it should be viewable in most of the world’s media players.
While the built in video editor is no Final Cut Pro or VideoStudio Plus, to put together a capable editing suite inside a phone is an admirable goal. There’s no reason why, even with these basic tools, that you can’t put together a good multimedia video in the palm of your hand.
Ewan Spence, 3 July 2007
Bonus link: AAS video podcast 11, covering much the same subject but with Steve Litchfield demonstrating using screenshots, commentary and examples.
